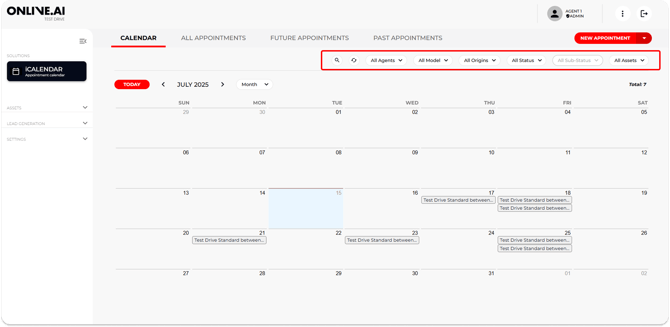
1.3.1.1. FILTERS
The Calendar tab provides access for the Agents to a series of filters for displaying the bookings that meet certain selection criteria: Month, Agent, Group.
More options may be available based on the system access level of each dealership.
1.3.1.2. MANUAL APPOINTMENT - NEW APPOINTMENT
This chapter explains how to schedule an appointment with an end user/customer from the iCalendar section.
Agents will not only be able to view the bookings made by users via the test drive landing pages, but they will also be able to manually create appointments/bookings from the calendar in the event that, for example, the dealership receives a request from a customer by telephone or in person.
To enter a test drive booking from the iCalendar section, click on the red “New appointment” button in the top-right of this tab.
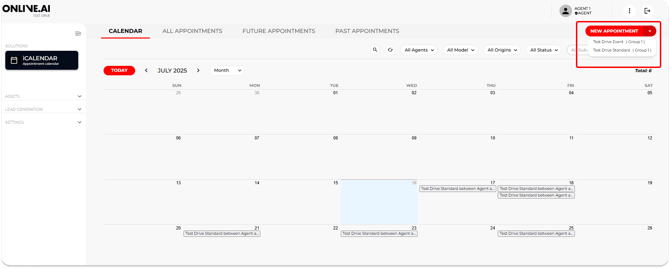
A dropdown menu will open for selecting the service you want to schedule: Service: “Test Drive Standard” or Service: “Test Drive Event”. After selecting a service, a pop-up window will open with a calendar.
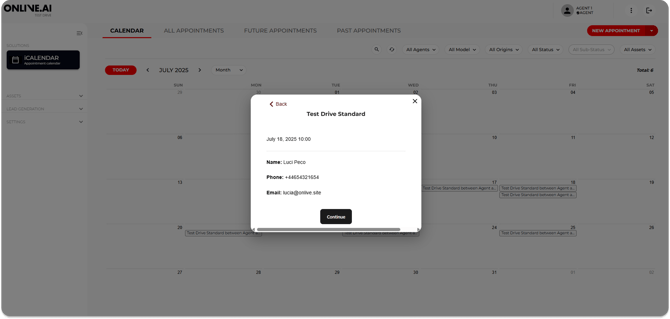
This will enable an available date and timeslot to be selected based on the preferences of the user.
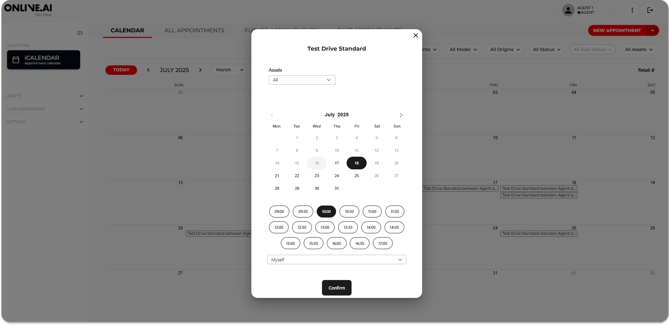
Next, you will need to enter all the personal details of the end user wishing to schedule a test drive, such as name, surnames, telephone number and e-mail address.
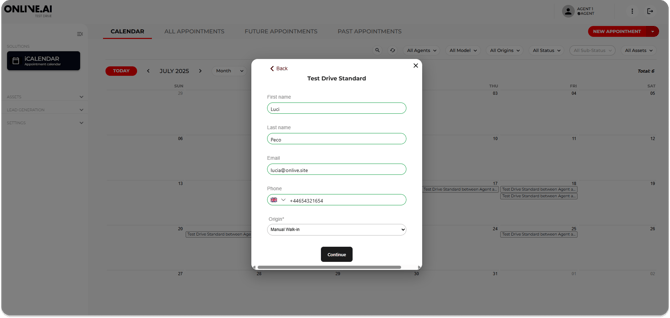
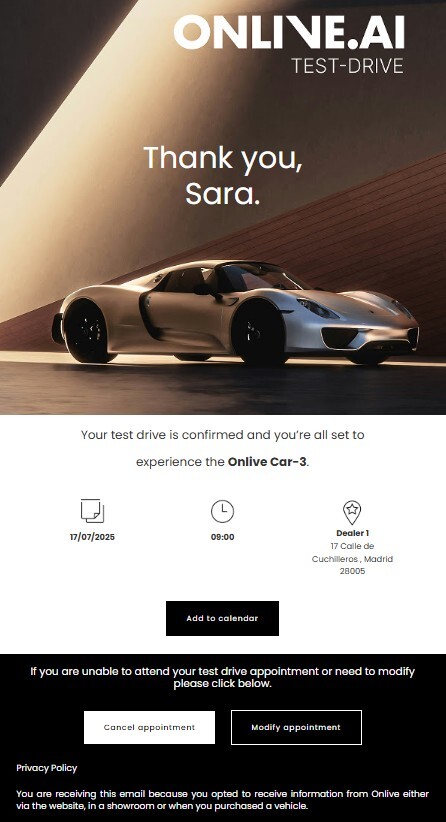
Once the details and date have been confirmed, by clicking on the Confirm button, the appointment will have been scheduled. The user will receive a confirmation email to their email address.
1.3.1.3. APPOINTMENT DETAILS
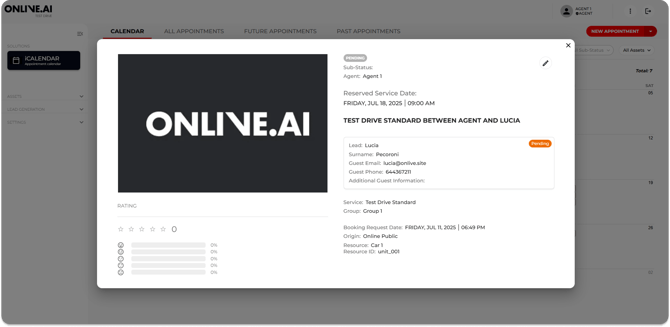
When clicking on any appointment/booking in the calendar, a pop-up window will open containing all the information gathered for that session. It will be possible to edit the file from here to include any necessary post-booking or post-test drive information.
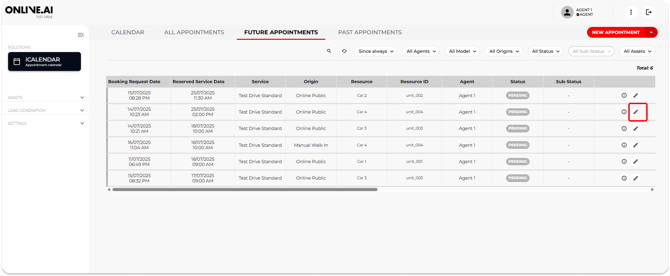
1.3.1.4. EDIT AN EXISTING BOOKING/APPOINTMENT
Agents can edit test drive booking appointments by clicking on any appointment in their calendars or clicking the pencil icon edit button in the “All appointments” or “Future appointments” tabs. To do this, simply click on the button marked with the pencil icon.

Clicking the “Edit” icon will open the general information tab about the test drive booking so that any necessary information fields can be filled in or edited.
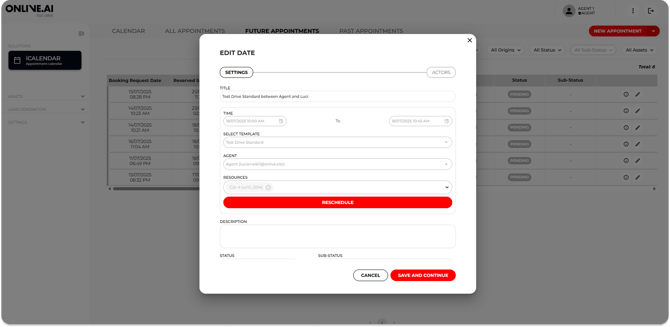
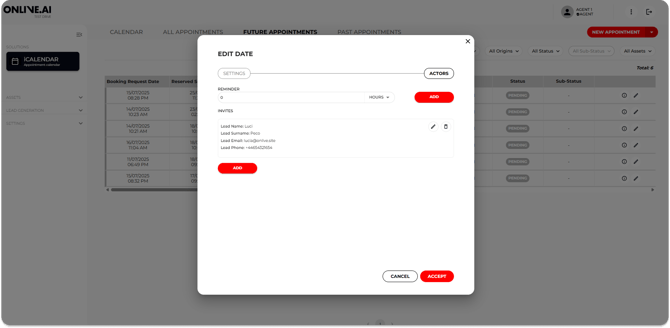
The next screen will show more detailed information about the end user/customer who made the test drive booking and various data fields can also be edited here, such as the number of reminder e-mails and how far in advance they will automatically be sent to the end user when their booking approaches.
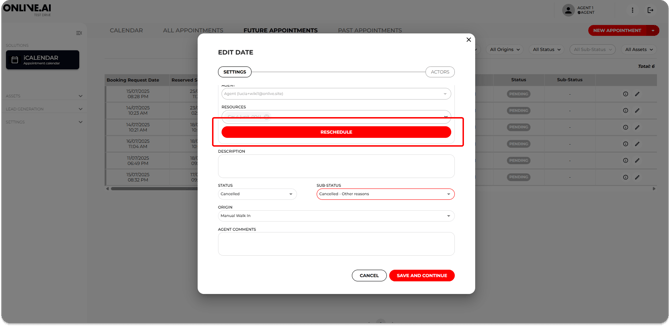
1.3.1.5. APPOINTMENT CANCELLATION BY THE AGENT
To cancel a session that has been scheduled with an end user, simply change the status to “Cancelled” in the edit booking section either from the calendar itself or from the booking display tabs. In either case, a test drive booking cancellation confirmation e-mail will be automatically sent to the end user and the Agent.
The Agent must also select a “Sub-status” and enter more details about the reason for cancellation in “Comments from the agent”.
As good practice, we recommend that the Agent call the end user to notify them of the booking cancellation and to inform them that they will receive a cancellation confirmation e-mail.

1.3.1.6. DATE/TIME CHANGES BY THE AGENT
To edit the time or date for a scheduled session, the Agent should open the booking and change it from the edit panel or from the calendar by clicking on the appointment.
This will automatically send an e-mail to the user informing them about the change of date and/or time for the scheduled session.